Tuesday, December 25, 2012

Happy Everything, with the Best Coconut Candies


We've had a very good Christmas. As for many people, for us the holidays are bitter sweet this year. We have loved ones who are suffering and fading, and it's awfully hard to watch. But, we do the best we can and we show up. Loving someone who is suffering can open one's heart in new ways. It can be fatiguing, but I know that our loving presence helps when nothing else seems possible.

Mix the candy and scoop onto parchment, then chill.

I am always searching for ways to bring some small pleasure to the people I love. For my mom-in-law, who can be lost and frightened in her dementia, I try to bring eye contact, smiles and hugs. I agree with her and nod and tell her that we will always love her and keep her safe. That's all we can do. For my father-in-law, who cares for her, we come and share a meal and easy conversation. We are patiently waiting for him to allow us to give him a break. Meanwhile, we just show up with love and whatever normalcy we can bring.

Once chilled, melt the chocolate and butter. Roll the balls smooth.

My mom has had a hard couple of years providing care for her own mom, my Grandma Betty. I love them both so much. My mom has health issues that often cause her a great deal of pain. When I visit, I try to convince her that she is a princess and she should allow me to do the work, chores and lifting. She tries to remember, but like me, she likes to do things for herself and she likes to do things for others. These coconut candies are her favorite. When I asked her if she would like them again this Christmas, her eye brows lifted in keen interest. When she bites into them, her eye lids flutter and she makes happy noises. This is just about enough present for me - to know that through this simple gift I've given her the opportunity for days of pure pleasure. For me, this is part of the magic of cooking. There is care and nourishment, but there is also the gift of pleasure. 

I hope that all of you who peek in on my little blog experience joy and pleasure this Holiday Season. No matter how we celebrate, we can all share the joy of Winter's sparkling lights and knowing that the longest night of the year has passed and we are now heading steadily back into the growing light of Spring. May Peace be with you.

Carefully dip the balls in the melted chocolate, one at a time,
and place on clean parchment.
Chill again, melt more chocolate and give them their second dip.

Mom's present, before we broke into them and helped her enjoy them.

Coconut Candies
For the candy:
14 oz. dry, shredded and sweetened coconut
1/2 cup powdered sugar
1/2 can of sweetened condensed milk (7 ounces)
2 tbsp. soft  butter
1/4 tsp. vanilla extract

Stir all the candy ingredients together in a bowl until well combines. Use a teaspoon or 1 tbsp. cookie scoop to portion the candy out onto a parchment paper lined cook sheet. Place in the refrigerator for a few hours or over night, until they are set. 

For the coating:
2 10 oz. bags of dark chocolate chips (I like at least 60% cacao), divided
2 tbsp. butter, divided

Place one bag of chocolate chips and 1 tbsp. of butter into the top of a double boiler. Gently melt the chocolate over water that barely simmering. Make sure the bottom of the top part of the double boiler does not touch the water. If the chocolate gets too hot, it will "break" and look curdled. Stir the chocolate until very smooth. While the chocolate is melting, roll the balls between your hands so that all the little coconut shreds will be tucked-in. Dip the candies, one at a time, into the chocolate. Carefully lift them out of the chocolate and let them drain for a bit. Place back onto a new sheet of parchment. Then they are all done, place them back in the fridge. While they are chilling, melt the second bag of chocolate chips and the remaining butter. When melter, did each ball again, one at a time and place back onto the parchment to harden. When all the balls have had their second coat of chocolate, place them back in the fridge and chill until they can be easily handled and put on a tray for gifting. 

Makes about 2 dozen.


Friday, December 14, 2012

Random Food Fridays - Cream of Carrot and Fennel Soup


This latest soup is the result of my CSA box. Winter brings lettuces, carrots, fennel, greens, oranges and apples. Not all of those ended up in this soup. Carrots and fennel are the star.

Fennel has a flavor and fragrance similar to licorice. It's pretty good raw, especially with oranges. But that is not my favorite way to enjoy it. Fennel becomes rich and sweet and mild when cooked. It is a great addition to a gratin or a soup. If you've never tried fennel, you should give it a go!

Cream of Carrot and Fennel Soup
1/4 cup extra virgin olive oil
1 leek, chopped (be sure to wash out any sand)
2 ribs celery, chopped
1 fennel bulb, trimmed and sliced thin
2 potatoes, peeled and diced
4 cups diced carrots
1 tbsp. fresh chopped tarragon, or 1 tsp. dry tarragon
1/4 cup chopped fresh flat leaf parley
6 cups chicken broth
1/2 cup half and half
Salt and freshly ground pepper, to taste

Place a large pot over a medium heat and add the olive oil. Add the leeks, celery and fennel and sweat them down until they are translucent. Add the remaining vegetables and herbs and stir to combine. Add the chicken broth. Increase heat and bring to a boil. Reduce heat and simmer until the carrots are very tender. Use a hand-held blender to puree the soup. There will a few chunks. If you want this soup very smooth, puree in batches in a blender or food processor. Stir in the half and half. Taste and season with salt and pepper. Makes about 10 cups.


Friday, November 30, 2012

Random Food Fridays - Breakfast Rice


So, as you can see, it's pretty hard to make rice pudding look exciting and pretty. You'll just have to take my word for it - This stuff is good!

People always talk about oatmeal as something that "sticks to your ribs." But I find that most cereals leave me searching for snacks by 10 AM. I wanted a hot cereal, but with ooomph! I remembered this yummy rice pudding, but wanted to make it again using fresh spices and less sugar. What a difference! I also made it a larger batch and reheated my serving each morning. You could make this vegan by using almond milk rather than regular milk. Do use the fresh spices. They are so warming and delightful on these wet and chilly mornings.

Breakfast Rice
1/2 cup raisins
2 cups cooked brown basmati rice
2 cups milk (I used non-fat)
1 stick cinnamon
2 big slices fresh ginger
4 green cardamom pods, whacked and cracked
1/4 to 1/2 cup sugar
pinch salt
1 can coconut milk
1/2 cup toasted, slivered almonds

Place raisins in a heat-safe bowl or mug and top off with boiling water. Set aside.

Place the rice, milk, cinnamon stick and cardamom pods in a saute pan. Simmer over medium heat, stirring frequently, until most of the milk is absorbed. Add the remaining ingredients except the almonds. Continue to simmer until the pudding reaches the desired consistency. Fish out the spices and add the almonds. Store in the fridge with a sprinkle of cinnamon.

This makes four generous breakfasts for me.

Update 1/28/13 - I just made this vegan, substituting the 2 cups of milk with 1 1/2 cups coconut water. Worked out just fine!

Friday, November 23, 2012

Cranberry Sauce with Quince and Ginger


We have had a great Thanksgiving. I hope you have too. I don't know about you, but every time we have a turkey feast, I wonder why we don't do it more often. It's really not that hard or complicated and then we eat yummy food for DAYS! One of my favorite post-turkey day meals is a lunch of turkey sliders on the rolls leftover from dinner. I never did get into putting stuffing on bread. Kinda redundant, right? But the cranberry - oh yeah!

Lucky for me, All Four Burners Can It Up is all about cranberries this month. This inspired me to search for a way to use cranberries with the quince I picked up from my "Quince Guy" at the farmers' market. I found this lovely recipe from Tigress. I cut it in half and altered it a little. Boy-Howdy, it's good. You can can this in a boiling water bath for 10 minutes, but I knew we'd have no problems eating up. This sauce is more toothsome than most and I like that. Each berry, chunk of quince and nugget of candied ginger brings a new taste.

Cranberry Sauce with Quince and Ginger
1 lb. of quince that has been peeled and cut into half inch cubes
2 1/2 cups water
2 1/2 cups sugar
1 cinnamon stick
2 strips of orange zest
1 1/4 lbs. fresh or frozen cranberries
1/2 cup Ginger People Ginger Chips

Place the quince, water, sugar, cinnamon and orange zest in a large pot. Bring to a boil and simmer until the quince is tender and slightly pink. Add the cranberries and ginger chips and return to a boil. Cook until the cranberries have popped and it begins to thicken. This took about 15 minutes for me. Don't over cook this because quince and cranberries both have ton of pectin and getting a set is no problem. Remove the cinnamon stick and orange zest strips and store. Either process in a boiling water bath in clean hot jars for 10 minutes or place in your fridge. This made about 8 cups.

Enjoy!

Wednesday, November 21, 2012

Three Sisters Stew


Here's another soup for your consideration. One of my favorite cookbooks is the Farm Journal's Country Cook Book.  It is loaded with very tasty recipes and is a snap shot of mid-century and mid-continent America. If you want to know how to culture and churn butter, bake a cake or pit roast a whole cow, this book is for you. One of the funny things about these kinds of books is that they often talk about the "energy" in food, aka calories. I guess if you are working a farm instead of a desk, you need to make sure lots of calories get into your food. They have one recipe for Supper Waffles that includes a whole cup of melted butter! Now that's some energy!

One of my favorite recipes from this book is called Indian Beans. As this recipe is obviously not from India, I'm afraid the name is not so PC. However, the taste is delicious. They are rather like baked beans but seasoned with cinnamon, a little sugar and apple cider vinegar. This stew started out with these beans in mind.


Lucky me, I have some serious gardeners in my life. My friend, Miss Pauline, had just about the most amazing garden ever this spring. She brought me a whole cooler full of yummy veg - all organic and completely beautiful. Her gift to me included two sugar pie pumpkins. I've never cooked pumpkins before, but I love orange squashes. To prepare these, I cut them in half, scooped out the guts, cut the halves in half, rubbed with some oil and roasted in a 350 oven until tender. These took about 45 minutes. I like the caramel flavor that developed from the toasty parts.


After I let them cool, it was easy to use my fingers to pull off the shell and then I cut into chunks. For this stew, I used one quarter of a pumpkin. The rest was processed for pie. This pumpkin was less dense than butternut squash, but just as sweet. You could use either.

I named this Three Sisters Stew because I added corn and pumpkin to the original recipe. It is a Native American traditions to grow maize, beans and squash together. The maize would provide poles for climbing beans and the squash would grow around the bottom. Miss Pauline grew them this way. You should have seen some of the beautiful heirloom beans and corn she grew!

This is another soup that starts with dried beans. Do not fear the beans! Here are the simple steps for making dried beans fit easily into your busy life:

  1. Measure, sort and wash - No kidding - I've found bean shaped rocks many a time.
  2. Soak - You have two ways to go with this - Overnight soak - Place beans in lots of water and place in the fridge overnight. Drain and begin your recipe with new water. Quick soak - Place beans in a pan with cold water to cover by about two inches. Bring to a boil. Remove from heat and cover. Let stand 1 hour. Drain and begin your recipe with new water.
  3. Cook - There are also two ways to cook - Stove top - Add beans and water to a pan with a heavy bottom and bring to a boil. Reduce heat and simmer until tender. Crock Pot - Add beans and water to crock pot and cook on high for about 4 hours for larger beans like pintos or chick peas. 

Tips -

  • If you cook on the stove top, keep an eye on it! I've had beans foam over and put out my gas burner. (This is why I love the Crock Pot!)
  • Do not add salt or acid foods until after the beans have already become tender. Salt and acid can inhibit the beans cooking correctly.
Three Sisters Stew
1 lb. dry pinto or pink beans (I used a combo)
3 quarts water
1 small onion, diced
1 cup diced celery
1/2 cup diced peppers (I used gypsy peppers)
1 15 oz. can diced tomatoes
1 cup diced ham
1 1/2 tsp. ground cinnamon
1 tsp. salt
3 tbsp. sugar
1 tbsp. apple cider vinegar
1 cup sweet corn kernels 
3 cups cooked and cubed pumpkin or squash

Use one of the soaking methods above. Drain and cook the beans in 3 quarts of water, using one of the cooking methods used above. When beans are tender, add remaining ingredients except for corn and pumpkin and simmer, uncovered until it reaches desired thickness. This will take longer in the crock pot. Before serving, add the corn and pumpkin and heat through. Adjust seasoning and serve.

This makes a lot, but will depend on how long you cook after adding the veg. My recipe, pictured above, made about 9 cups. I like mine with a shot of Tapatio.

Thursday, November 1, 2012

Random Food Fridays - Chick Pea Curry


Chick Pea Curry was last Sunday's project. I like to go to the farmers' market on Sunday morning and do food prep in the afternoon. It's enjoyable and I have a much better chance of eating a healthy lunch during my work days. Somehow, making a sandwich is just beyond me in the morning. For me, mornings are slow and gentle and, often, not timely. Pre-packed lunches can really save the day.

From left to right -
garlic, sweet potatoes, ginger, turnips, red bell pepper, gypsy peppers, eggplant, shallot, curry powder, coconut milk, chick peas,
diced tomatoes 
Not pictured - Magic (as in magically delicious)


This curry is a hybrid of Indian and Thai curry flavors. I've used a combo of late Summer and early Winter produce. (I guess that would be Fall, technically.) We're getting the last good tomatoes, peppers and eggplants, but sweet potatoes and turnips are now on the scene. I used chick peas and served this with brown basmati rice for a complete protein. I usually use red Thai curry past with coconut milk and diced tomatoes. This time I tried a curry blend I picked up from a vendor at the Auburn Farmers' Market. It turned out delicious!

Like any soup or stew, curry dishes are infinitely variable. Use the veg you like. Use the protein you like. Use the level of spice you like. Eat a healthy lunch every day!

Chick Pea Curry
1 tbsp. coconut oil

1 to 2 cloves of garlic, diced small
1 tsp. fresh grated ginger
1 to 3 tsp. of curry powder (might want to add one at a time)

2 cups peeled and cubed sweet potatoes
1 cup turnips, cubed
1/2 of one red bell pepper, seeded, cored and cubed
2 gypsy peppers, seeded, cored and cubed
1 cup eggplant, cubed
1 large shallot, sliced (or any kind of onion you like, of course)
2 cups cooked chick peas
1 can coconut milk
1 can diced tomatoes
1 tsp. salt (for the curry, not the boiling water)

Cooked brown basmati rice for serving
Cilantro for garnish

In a large soup pot, boil the sweet potatoes and turnips in salted boiling water until just tender - about 5 minutes. Drain.

Dry the same pot and replace over the flame. Reduce heat to medium and add the coconut oil. When the oil has melted, add the garlic, ginger and curry powder. Stir quickly to prevent from scorching. Add the peppers, egg plant and shallots. Stir to coat. Saute for about 5 minutes. Add the remaining ingredients, except for the rice and cilantro. Check the spice level and add more curry powder, if desired. Simmer gently until the veggies are done to your liking. Serve with rice and cilantro.

Make 6 servings

Friday, October 26, 2012

Random Food Fridays - Butternut Squash and Kale Saute

Yum, oh YUM! Please pass me some!

I was inspired to make this dish by a cooking demo at the Auburn Farmers' Market a couple of weeks ago. Their FM Association uses produce from the vendors to show folks how easy and delicious veggies can be. Because I wanted to share this yummy dish with Mr. Dwayne, I made one adjustment and that was to leave out the wonderful curry spice mix they used. (Sold at the FM for $5 a jar!) Even without the curry flavor, it is savory, sweet and so good. I've made this twice in the weeks since the demo. It is also an awesome frittata filling. Yum!

Butternut and Kale Saute
1 tbsp. olive oil
2 cups of butternut squash that has been peeled and cubed
1 large shallot, sliced thin
1 cup of apple, peeled and cubed
4 cups of kale that has had the ribs removed and been cut into thin ribbons
About 1/2 cup water or broth
Salt and freshly ground black pepper, to taste

Heat the oil in a large saute pan and add the butternut squash, shallot and apple. Over a medium flame, cook until the squash begins to become tender. Add the water a little at a time, if the squash begins to stick to the bottom of the pan. The steam will help the squash to cook and keep the dish from scorching. Once the squash becomes tender, add the kale ribbons and a little more water. Toss to combine and cover. Let the kale steam for a few minutes until it is tender. Adjust seasoning and serve.

Butternut and Kale Frittata
1/2 cup Butternut and Kale saute
2 eggs
1 tbsp. Greek yogurt
Salt and freshly ground black pepper to taste
2 tbsp. grated Parmesan cheese

Add the veggies to an 8 inch omelet pan with an oven proof handle. If it is not non-stick, add a little butter first. While the veggies are heating, beat the eggs, yogurt, salt and pepper together in a bowl. Add the egg mixture to the pan. Place a rack on the top shelf of your oven and heat up the broiler. Gently lift the edges of the frittata and let the liquid egg run under the cooked part. When the eggs have barely set, but are still runny on top, sprinkle with the cheese and place under the broiler. Broil just until the cheese melts. Remove from the oven and gently tilt and scoot the frittata onto your plate and eat!

Friday, October 19, 2012

Rose Hip Syrup


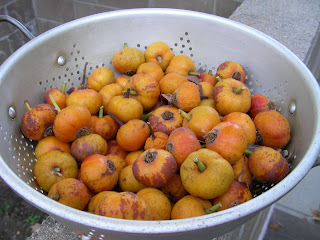
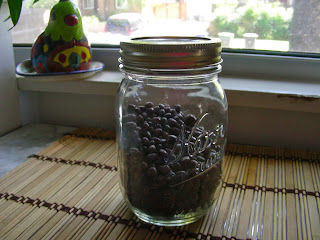
I've been taking care of my great grandmother's and my grandmother's roses for years. I retired from caring for my grandma's roses when she sold her house. I still care for the roses that are left from my great grandmother as we've lived in her house for almost 30 years. I was taught to dead head roses right away. By doing this, you keep the roses' energy directed at blooming at not at completing the reproductive cycle. If I ever saw a rose hip developing, I thought, "Dang! I missed one." Not, "Yay! Rose hip syrup!" When I discovered a cache of rose hips in a parking lot I knew it was my big chance.


I keep my eyes open for foraging opportunities as I wander through my life. Turns out that there is a rose hedge, next to my Trader Joe's, that has been pretty much abandoned. For a forager, this is a good thing. I know it hasn't been sprayed or fertilized for some time. There was once an Italian food market on the other side of the rose hedge from TJ's, but now there is a pet supply store and they don't have any interest in the roses. The rose hips on these bushes are large and orangey yellow. You may see wild roses with little red hips. I've read that these are very good for syrup too.


My friend, Miss Pauline, who is a gardening genius, told me that rose hips are sweeter after a frost. I'd be awaiting a frost for long months in this climate. There are some winters where we don't have a frost at our elevation at all. I have now made two batches of rose hip syrup, from these same bushes. The first batch was made when the hips were larger and juicier. For the second batch, the hips were dryer and some had been a bit sunburned. My perception is that the first batch has less bitterness than the second. It may be that in cold climates, the rose hips would freeze while still moist. With our unseasonable heat, they've just been drying up. If these hips are available next year, I'll try to work with them in September, when they are still plump.

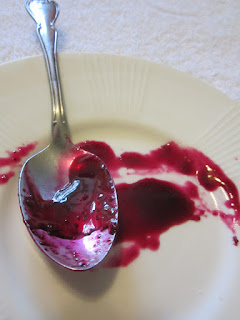
As I researched recipes for rose hip syrup, I found many war time references. Check out this article that explains how rose hip syrup was used to prevent scurvy in the UK during WW II. Rose hips are very high in vitamin C. Because of the vitamin C content, I thought they would be very sour. I was thinking of a flavor something like hibiscus, but this rose hip syrup is nothing like that. I smells and tastes like apples, almonds and rose petals all in one. The flavor has a subtle bitterness that I balanced out with lemon juice. The lemon juice also brought up the acidity to a safe level for water bath canning. Some recipes for this type of syrup are thick with sugar. I didn't intend to end up with a syrup suitable for pancakes or a dessert topping. I wanted a syrup more analogous to fruit juice for flavoring soda water. I really like this flavor and it's like no soda I've ever had before. It is a great way to get a good dose of vitamin C in a tasty, sparkling form.

Rose Hip Syrup
2 pounds ripe rose hips
3 quarts water
1 cup sugar
1/4 cup lemon juice

Wash the rose hips and remove any extra stems or flower parts. Place in a large pot and add the water. Bring to a boil, reduce heat and simmer until tender - about 90 minutes. Mash the hips with a potato masher and simmer about 10 minutes more.

Place a colander over a smaller sauce pot and line the colander with at least 6 layers of cheese cloth. Pour the rose hip mash into the colander and let drain. If you want a clear liquid, as for jelly, let it drain slowly with no pressure. I squeezed every last bit of liquid out of mine! You can prepare everything up to this step, add the lemon juice and refrigerate until ready to bottle.

When ready to bottle, prepare 6 half-pint jars and lids and the boiling water bath. Bring the liquid to a boil and stir in the sugar. Simmer while waiting for the BWB come to a boil. It will reduce slightly. Carefully ladle the syrup into hot, sterilized jars. Wipe rims and top with lids and rings and close to a finger tightness. Process in the boiling water bath for 10 minutes. Carefully remove and allow to cool.

Makes 5 to 6 half pints.

For a refreshing soda, add 3 tbsp. syrup to a pint of sparkling water and ice.

Friday, October 12, 2012

Random Food Fridays - Apple Sauce


It's apple time! We've been waiting for the cool Fall breezes for a while now. Our temperatures were close to a hundred right up through the end of September. We've had overcast for a few days now and I am hoping for the rain. Nothing makes our air (which can be pretty exhaust filled) smell so clean as the first good rain of Fall.

You may recall that I made homemade pectin out of green apples from my father-in-law's MacIntosh tree. I can usually make the green apple pectin sometime in June. The ripe apple harvest happens in September. I had two big grocery bags of apples on my kitchen floor for a couple of weeks. I'm lucky. These apples have such great character (flavor and aroma) that they forgave me for allowing them to get a little overripe.

MacIntosh apples are one of the great cooking apples. They are tart and sweet and cook down nicely. I decided to make apple sauce out of these apples. I read the Ball Blue Book for basic instructions, such as acidity and timing for the boiling water bath, but I did not follow their recipe. Most apples are acidic enough that you need not add anything to them to bring them to a safe PH for the boiling water bath. Even so, I love some lemon to brighten things up. Unless you burn it or allow it to spoil, it's really hard to make apple sauce taste bad. I spent about an hour coring the apples and removing any bad spots. (There were a few worms, but hey, they are healthy organic worms!) I had enough to fill my three biggest pots! To each pot, I added 1/4 cup lemon juice, 1/2 cup sugar, two cups of water, a good sprinkling of cinnamon and a dash of salt. I didn't peel the apples because I just run the cooked apples through a food mill. I think I capture some of the color and nutrients of the peel that way. (And really, who wants to peel when you don't have to?)

 Here they are, cooking away. I smashed them with a potato masher to help them break down. 


After about 30 minutes of simmering, they were soft enough to put through the food mill. I ended up with my big stock pot FULL of apple sauce! At this point, I put the big pot in the fridge for the night and went to bed.


The next evening, after work, I sterilized my jars and lids, prepared the hot water bath and heated up the apple sauce. This is when I tasted and adjusted for flavor. It tasted just right to me. You can always add more lemon, sugar or spice. When everything was nice and hot, I ladled into wide mouth pint jars, used a bamboo skewer to release the bubbles and processed for 20 minutes. My two brown grocery bags full of apples turned into 12 pints of apple sauce. I must say, it's really good! To make yummy apple sauce, you don't need to tackle 12 pints' worth. Even if you buy a couple of pounds of good apples at the farmers' market, you can make apple sauce by this same method and just store it in the fridge for a week or so. I bet you eat it all before you find out how long it takes to go bad!

Thursday, October 4, 2012

Random Food Fridays - White Bean Guacamole


I can't believe I haven't given you a RFF post since September 7th! Life has been pretty hectic. Family stuff, work stuff, harvest stuff, canning stuff, Fall garden installation stuff. Whew! Zip! Bang! Pow! Mother Nature requires attention to timing. Late Summer/early Fall are high intensity times in the garden. This is true, even for a tiny garden like mine. So far, tomatoes, green beans and chard have come out. Kale, peas, spinach, carrots, daikon and radishes have gone in. I still have more to plant, including some lovely fava beans to fix nitrogen in the soil. I don't know if I like fava beans, but they are very pretty bushes and do the soil a lot of good.

So, here I am on a Thursday night, creating my post for Friday. Tomorrow we have the pleasure of attending the opening of a sci-fi and fantasy inspired art show at Art Ark Gallery in San Jose. Our girl is showing her work! We did have plans to bring her back home with us for a visit with her grandmas, but she's had a bad cold. We just can't take germs around the oldsters. So, instead of a round of grandma visits, we will be viewing her show and coming back home to our empty nest.

When life gets crazy, I often end up eating on the fly. Even if I don't eat fast food, I often eat too fast! I really like to eat my own food. That's why I do all this stuff. I mean, it's GOOD! If  I plan ahead, I can avoid spending my lunch time obtaining food and just start eating. If I know things are ratcheting up, I have to plan work-day lunches on Sunday. That's the only way to do it. Beans are a favorite. They end up in salads, soups, spreads, and dips. To make cooking from dry beans easier, I measure, sort, wash and then place the beans in a jar in the fridge until I'm ready to cook them. They can wait for several days. You have to pick a jar that is a lot bigger than your beans because they grow so much. I usually put 1 cup of dried beans into a quart jar of filtered water. The next step is cooking. If you are home for a few hours, cooking on the stove stop only takes an hour or two, depending on the type of bean. One of my favorite ways to cook beans is in the crock pot. I drain and rinse the soaked beans and add them to the crock pot with fresh water. I've cooked them overnight or during the work day. Voila! Cooked beans with no effort.

This dip is super yummy. It's kind of a hybrid of bean dip, hummus and guacamole - all flavors I love! I've enjoyed this with soft corn tortillas, corn chips and fresh veggies. Gotta change it up somehow, right?

White Bean Guacamole
1 cup dry, small white beans
1/4 cup red bell pepper, diced small
2 tbsp. shallot, diced small
1 large clove garlic, crushed
big hand full of loosely chopped cilantro
2 tbsp. lemon juice
1 tbsp. extra virgin olive oil
1/2 salt
1 tsp. Tapatio sauce
2 ripe avocados

Sort and rinse the beans. Place them in a quart jar and fill the jar with cold water. Place in the fridge until ready to cook. Soak at least 8 hours.

When ready to cook. Drain and rinse the beans. Place them in a crock pot and cover with cold water. Cook on low for 6-8 hours. (You will get to know your crock pot just like you get to know your oven.) When the beans are very soft, drain. Allow the beans to cool off a bit. They can be warm when you add the other ingredients, but don't add them when they are so hot that you risk wilting the cilantro. Mash the beans and stir in the remaining ingredients except for the avocados. If you are serving this at a party, you can mash the avocados in all at once. Because I took this for several lunches, I mashed in half an avocado for each lunch.

Makes about 3 cups

Saturday, September 29, 2012

Dilly Long Beans


Well, hi there! It's been a while! I have been cooking and creating, but haven't had the brain power to sit down and post. The good news is, I have several yummy things to share in the next week or so.

If you have never been to a farmers' market, I so urge you to go asap. Produce at the farmers' market is good, fresh, local and not expensive at all. There is a persistent myth that healthy food has to be expensive. I think this is true only if you are buying specialty items. Regular old fruit and veg are cheapity-cheap. Because of the large variety available at the farmers' market, I can try new things and if I need some help, the farmer is right there to give me pointers. They want me to enjoy their produce!

Here is a dramatic price comparison for you:

Lemon grass:
Bel Air - A tiny clam shell with one stalk cut into thirds, $2.99
Safeway - $6.99 per pound (it looked horrible too!)
SF Market in Little Saigon - 99 Cents per bunch, which has about 4 stalks
Sunday farmers' market - A big handful for a buck! (plus the nice lady shoved mint in my bag because I had to wait a minute)

I make iced tea with lemon grass and fresh ginger several times a week and I go through it pretty fast. There is no way I will pay $6.99 a pound for an inferior product! Herbs are one of the things that are always freshest and cheapest at the farmers' market. Most herbs grow like weeds, so I don't really know why they are so expensive at the grocery store. In fact, planting herbs is really the cheapest option. Many herbs are perennial and you will enjoy one plant for many years. I'm not much of a gardener, but I've always had good luck with parsley, sage, rosemary and thyme. (I couldn't resist!)


This week, the family that grows my lemon grass and other herbs, had beautiful long beans. I've been wanting to make dilly beans for a while and I thought it would be fun to experiment with long beans. I figured I could cut them to the length of any jar and they are usually pretty straight. I bought two bunches of green long beans. I don't know how much they weighed. They are bound at the top by a rubber band and the bound bunch was probably about 4 inches in diameter. As I was making my way out of the market, I noticed another family had purple long beans. They were gorgeous! They had to join my green long beans! Now, not only do I have dilly long beans, I have multi-colored dilly long beans! How cool is that!

I used the same brine I use for my little cucumber dills. Because the beans are smaller than the cucumber dills, the brine penetrates them more fully than the cucumber dills. In flavor, they remind me a bit of capers. I think it would be awesome to decorate the top of deviled eggs with purple beans. Stylish!

Dilly Long Beans
3 big bunches of long beans (I used 2 green and 1 purple)
6 cloves of garlic
6 sprigs of fresh dill weed
3 tsp. dill seed (1/2 tsp. per jar)
2 cups distilled white vinegar
6 cups water
1/3 cup kosher salt
1 1/2 tsp. whole black pepper corns (1/4 tsp. per jar)

Prepare 6 wide mouth pint jars, lids and rings. Prepare the boiling water bath.

Wash and trim the ends from the beans. Use a ruler to cut the beans so that they fill the jar with 1/2 inch head space. Peel the garlic and split each one in half, lengthwise. Set aside.

Bring the vinegar and water to a boil and stir in the salt to dissolve. Place the hot, sterilized jars on a towel and place one garlic clove, 1/2 tsp. dill seed and 1/4 tsp. black pepper corns. Carefully fill the jars with the beans, keeping them as straight as possible. Add the purple beans last, around the outside of the jar. Stuff the dill weed down one side, making sure everything is clear of the 1/2 inch head space. Pack the beans as tightly as possible, because they will shrink when processed. After the jars are filled, carefully pour the hot brine over the beans, again being careful of the 1/2 inch head space. Carefully wipe the rim of the jars and top with the prepared lids and rings. Process in the boiling water bath for 10 minutes. Allow to cure for two weeks before opening.

Makes 6 pints


Friday, September 7, 2012

Random Food Fridays - Rockin' the Pizza!


I'm having a hard time coming up with superlatives for pizza. I mean, it's pizza! Everybody likes pizza. I've seen vegans eat pizza with no cheese. I've seen gluten-free pizza with veggie crust. I've seen pork sausage swimming in a puddle of grease, using bell pepper rings as life preservers. I've seen it all. And, there is that famous quote that I once heard in a movie, "Sex is like pizza. Even when it's bad, it's still pretty good." (Tootled around google and could not find a reliable source for this quote. If you can remember, let me know.)


I can honestly say that I've eaten some of the best pizza of my life out of my own oven. Remember Butternut Squash Pizza? I'm looking forward to that specialty this Fall. One of the reasons homemade pizza rocks so hard is that you can make it just how you like it best. Your thickness of crust. Your favorite toppings. Your favorite cheeses. It's all you baby!


Here are some tips to make your homemade pizza especially good:

1. Make your own crust and use good extra virgin olive oil - My crust recipe is a basic one that won't fail you. If you like a thin crust, it is essential to let the dough rise at least once and then reform it and let it rest before stretching. The resting period should be about 10 minutes. More details in the recipe below.

2. Use a VERY HOT oven. Preheat your oven to 500 degrees and let it remain at that heat for about 10 minutes before you start to bake. Get to know your oven. My oven has a convection setting, but I find that the traditional bake setting works best for pizza. In my oven, this means that the heat comes from the bottom rather than circulating with the convection fan. The bottom of the crust gets nice and crusty this way. I use well seasoned, thin cookie sheets to bake and place the pizza in the top third of my oven. If you are talented enough to use a peel and pizza stone, go for it!


3. Use very flavorful cheese - I like Trader Joe's Quattro Formaggi. This is a cheese blend that includes mozzarella, asiago, provolone and Parmesan. Using strong flavored cheeses makes a huge difference from using plain mozzarella. Now, if you want to use a good fresh moz, I approve. Fresh mozzarella is sweet and creamy and totally different from the mozzarella used by most pizza places. I'm just saying, your pizza will only be as good as your cheese. Use a cheese that you would eat by itself and one that will compliment your other toppings. Another tip - cheese is the glue for your pizza, so use some below and some above your toppings.

4. Use great toppings that are not too wet - I used fresh, sliced tomatoes on the pizza you see in these pictures. The tomatoes I used are an heirloom variety that are very meaty, plus a few sungold cherry tomatoes. If the tomatoes had been super juicy, I would have cut them in half and squeezed some of the juice and seeds out before slicing. I don't like my pizza to resemble a blow-up pool filled with grease or tomato juice.

5. Divide the dough so that each person get their own pizza - Mr. Dwayne's pizza was meat sauce (Mixmaster Bill's Special Sauce!) with lots of cooked sweet Italian sausage and lots of cheese. Mine had tomatoes, garlic, sliced green onions, fresh basil, some of that sweet Italian sausage and cheese. Vive la difference!

I know that pizza doesn't need a hard sell, but I hope that you will try making pizza with your family. It really is worth the effort.

Late Summer, Thursday Night Pizza, Susan Style

Basic Dough:
1 1/2 cups warm water
1 tsp. sugar
1 packet active dry yeast
4 cups all purpose flour
2 tsp. salt
1/4 cup extra virgin olive oil

Stir together the warm water, sugar and yeast. Set aside until bubbly. Place the flour and salt in a large bowl or in your Mixmaster with the dough hook attached. Add the water mixture and stir to combine. Knead until smooth and silky. (5 minutes by machine or 10 minutes by hand.) Add 2 tbsp. of the olive oil and work it into the dough. Pour the other 2 tbsp. olive oil in a large bowl. Remove the dough and form it into a ball so that the outside is smooth. Roll it around in the bowl of olive oil making sure you end up with the smooth side up. Cover with a lid, plate or plastic wrap and a towel. Allow to raise in a warm place until doubled in size.

(Alternately, you can place this bowl in the fridge and use the dough another night. If it gets too big, just press the air out gently and reform the ball until you are ready to use it. Bring it out of the fridge to come closer to room temp about an hour before you plan to bake.)

Divide the dough and form each segment into a ball. Cover and let rest for about 10 minutes before shaping the pizza.

This dough will make two medium pizzas with a medium crust. You can use the whole batch for a large pizza with a thicker dough. Each pizza will bake for about 15 minutes in the preheated 500 degree oven. You'll want to check sooner until you get to know your oven.

For my toppings:

2 handfuls flavorful cheese

1 handful cooked sweet Italian sausage

1 large tomato, cored and sliced thin
a few cherry tomatoes, cut in half
a handful of fresh basil leaves
a handful of sliced green onions
2 cloves garlic, crushed
1 tbsp. extra virgin olive oil
kosher salt
freshly cracked black pepper

Toss all together. Set aside for 5 minutes to allow the salt to draw out some of the moisture.

Oil your baking pan and gently stretch the dough to almost fill the pan. Sprinkle with some cooked sweet Italian sausage and a big handful of cheese. Remove the veggie mixture from the juices and place them on the pizza. Cover with another small handful of cheese.

Bake in the preheated oven for about 15 minutes, or until the bottom of the crust is brown and crusty. Carefully remove to a wrack and allow to cool for about 5 minutes. Transfer to a cutting board and slice.

This was so darn good!

Sunday, September 2, 2012

Food Literacy Sandwich - Ginger Turkey and Wasabi Slaw Sliders


This sandwich was created to help the nonprofit California Food Literacy Center celebrate Food Literacy Month. The ingredients are good for you, good for the planet. www.californiafoodliteracy.org.


For the ginger turkey burgers...


Amber Stott is the genius behind the California Food Literacy Center and Food Literacy Month. She's also the creator of Awake at the Whisk, a great blog with recipes that are as fun as they are delicious and thoughtful. She's invited several bloggers and local restaurants to invent food literacy sandwiches. Here's the definition:


Food Literacy [fu: d lit-er-uh-see]
noun: Understanding the impact of your food choices on your health, the environment, and our community.


What’s a “Food Literacy Sandwich?”
You decide! It should take the definition of food literacy (above) into consideration. Is it healthy? Is it sustainable for our planet and community? You may already have a great sandwich on your blog that fits this description. Why not change the name and re-post it to let your readers know you care about the health of our children and our planet?


For my Food Literacy Sandwich, I've called on the rich cultural resources of the Sacramento area. This is a fusion of Vietnamese and Japanese flavors, all held together with one of my weaknesses - King's Hawaiian Rolls. I made these up today and got a big thumbs up from my tester, our friend Marcus (aka Big Sexy). Dude knows food.

The slaw is full of fresh flavors, with a little fruit for sweetness. I think the creamy, lively slaw is the perfect foil for the rich flavors in the ground turkey mini-burgers. I recommend making up the meat mixture and the slaw at least a couple of hours in advance, then cooking them to order. Juicy!

Ginger Turkey and Wasabi Slaw Sliders

For the mini-burgers:
1 lb ground turkey
1 tbsp. fish sauce
2 tsp. soy sauce
1/2 tsp. toasted sesame oil
2 cloves of garlic, crushed
1 tsp. fresh grated ginger
1 tsp. fresh grated lemon grass
1 green onion, sliced

Add all the ingredients together in a medium sized bowl. (I used a micro plane grater to grate the ginger and lemon grass.) Stir with a carving fork until mixed, but do not compact the meat. Cover and refrigerate until ready to use.

For the Wasabi Slaw:
1 tsp. wasabi powder plus 1 tsp. hot water
2 cups thinly sliced Napa cabbage
1 cup of pea shoots
1 green onion, sliced
1/2 avocado, peeled and diced
1 tsp. rice vinegar
1/2 cup red radishes, grated
1/2 of a pear, grated
1/3 cup sour cream
1 tsp. sugar
pinch of salt

Combine the wasabi powder and hot water and let stand to rehydrate. Add the rice vinegar to the avocado and toss to coat. Run a knife through the pea shoots to cut into lengths of about 1 inch. In a large bowl, toss the cabbage, pea shoots, green onion, avocado, radishes, and pear. Mix the wasabi, sour cream, sugar and salt. Gently toss the slaw with the wasabi dressing. Cover and refrigerate until ready to assemble the sliders.

To assemble:
8 King's Sweet Hawaiian Rolls (I used Honey Wheat)
Cilantro

Heat a large cast iron or heavy bottomed skillet over a medium-high heat. Brush with oil or use a spray.  Use a 4 oz. ice cream scoop to measure out the sliders. Lightly press down to flatten. When the pan is hot, place the sliders in the pan and cover loosely. When the bottom has browned nicely, turn the sliders. Continue to cook until the internal temperature comes up to 165 degrees. Remove from heat.

Split the Hawaiian Rolls. Top the bottom half with one of the turkey burgers. Top the turkey burger with about 2 tablespoons slaw. Top the slow with cilantro, if desired. Top with the rest of the bun and EAT!

Makes 8 sliders.

Roll Call!

Grocery Store - ground turkey, fish sauce, soy sauce, sesame oil, rice vinegar, wasabi powder, cabbage, pea shoots, ginger, sour cream, sugar, salt, King's Hawaiian Rolls

Farmer's Market - garlic, lemon grass, green onions, avocado, pear, radishes, cilantro


Friday, August 31, 2012

Random Food Fridays - Sweet Potato and Adzuki Bean Salad


Here's another crazy salad for your consideration. I often visit the farmers' market on Sunday mornings and then spend much of the afternoon preparing food for the week. My go-to lunches are salads in Summer and soups in the cooler months. With soups and salads there are no limits. You've seen plenty of salads if you check this little blog on Fridays. This salad came on a Sunday when I didn't make it to the market. I foraged in my fridge and pantry for likely pairings and boom! Salad!


Adzuki beans are little dark red beans that are slightly sweet. They are often used in Japanese desserts. I've had sweet bean paste in mochi and whole sweet beans in shave ice and in chilled fruit salad. You might think sweet beans are weird, but think about baked beans - they are sweet and delicious. I also chose to use adzuki beans because they are small and don't take as long to cook as larger beans.


I started with 1 cup of dried beans and ended up with about two cups cooked. Not all the beans got used in this recipe. I used about 1 1/2 cups, similar to what you would find in a can of beans. You can use any kind of bean you like.

Sweet Potato and Adzuki Bean Salad
1 medium sweet potato (about 1 lb)
1 large, ripe tomato, cored and diced
1 small red pepper, cored and diced
1 carrot, diced
1 shallot, peeled and diced
2 ears sweet corn (I had leftovers from the grill), cut from the ears
1 big hand full chopped parsley
1 1/2 cup cooked and drained adzuki beans
white wine vinaigrette*
hot sauce, if desired (I like Tapatio!)

To cook the sweet potato, peel and dice into about 1/2 inch chunks. Bring a pot of water to a boil and add the sweet potatoes. Cook until just fork-tender. Do not over cook. Drain and rinse with cool water.

Toss all the veggies and beans together and add vinaigrette to taste. Add hot sauce, if desired.

Makes 4 lunches for me.

*White Wine Vinaigrette
1/2 cup white wine vinegar
1 cup extra virgin olive oil
1 tsp. country style Dijon mustard
1/2 tsp. salt
1/2 tsp. cracked black pepper
1 clove garlic
1/4 tsp. sugar
1/4 tsp. garlic and herb seasoning

Add all ingredients to a jar with a tight fitting lid and shake like crazy.


Friday, August 17, 2012

Random Food Fridays - Gluten Free Peach Crisp


My dear friend, Miss Paula, is off the gluten. She says she feels much better for it, with several pounds released and a sharp decline in her acid reflux. Me, I say, "Pass the bread, and don't forget the butter!"

So often, when I bake a treat, Miss Paula cannot enjoy it with us. Every once in a while I try to whip up something we all can enjoy. This is one of those recipes and it came out great. If you don't want or need your finished product to be gluten free, you can use regular AP flour in place of Pamela's pancake mix.

By the way, Pamela's mix make fantastic pancakes!

Gluten Free Peach Crisp

8 cups fresh peaches that have been peeled, pitted and sliced
1 tbsp. lemon juice
2 tbsp. cornstarch
1/2 tsp. cinnamon
1/2 cup sugar

2 cups old fashioned rolled oats
1/2 cup Pamela's Baking and Pancake Mix
1/4 tsp. salt
1/4 tsp. cinnamon
1/2 cup sugar
1/2 cup packed brown sugar
1/2 cup cold butter
1 cup dry toasted sliced almonds (I like Trader Joe's)

Preheat the oven to 400 degrees.

Place the peach slices and lemon juice in a large bowl and stir. In a smaller bowl, combing the cornstarch, cinnamon and sugar, then stir this mixture into the peaches. (Mixing the cornstarch in with the sugar helps to prevent it making clumps when you stir it into the fruit.)

Butter a 9 X 13 inch bake pan. Spread the prepared peach mixture into the pan.

In another bowl, combine the oats, Pamela's mix, salt, cinnamon and sugars and give it a stir. Cut the cold butter into little chunks and add to the oat mixture. Combine the mixture by squishing it together with your fingertips. When it is well combined, stir in the sliced almonds.

Spread the oat mixture over the peaches and bake in the preheated oven for about 45 minutes.

Serve warm with vanilla ice cream. Yum!

Wednesday, August 15, 2012

Wild Grape Jelly


Food is everywhere. Really! At least, where I live, in the great valley of Sacramento. This is farm country. If you ever fly into Sacramento, you will see a green and gold patchwork all around, with glints of light flashing up from the rivers and rice paddies. It's magic. I think we sometimes take it for granted.

Some foraging outings are easier than others. Leaves may be tricky for a beginner to identify and prepare well. But, fruit is often easy to smell, see, gather and eat. The plant's effort to grow and increase  results in generous gifts for those of us who gather and eat. I've foraged figs, blackberries, wild plums, feral pears, and elderberries. None of them are much effort, except maybe the blackberries. I spotted these grapes growing up and over elderberry bushes and bitter almond trees near my house on a levy. Usually, I'm cautious about foraging close to a road. There may be spraying. My philosophy is this - the more abandoned and unkempt the area looks, the less likely it is to be managed by chemicals. My only competition for the fruit I gathered in this spot was a raccoon. We had a bit of a staring match, then Mr./Mrs. Raccoon decided to retreat and come back again later. Very gracious and appreciated.

As I travel through this beautiful world, I find myself scanning the roadsides, open fields and public spaces. Sometimes I find treasure, like the loaded peach tree I found in an abandoned parking lot last night. Sometimes I wonder why there isn't more food growing everywhere. Why not have parking lot trees that provide shade and fruit? Granted, there may be some splats in the harvesting season. I wouldn't mind. Even a "vacant" lot in an urban neighborhood, can have tons of edible plants. Fruit is more rare than those leafy pioneer plants that populate fields, but it is out there and in abundance.


Wild grapes will range from a transparent green to deep purple as they ripen. They are smaller than table grapes and have large seeds. They taste nice, but are tricky to eat because of the seeds. If you find a ton, you could make grape juice for canning. Grapes have plenty of pectin and if you are patient, you will be rewarded with a beautiful color and wiggly set. I never really liked grape jam or jelly as a child. Those flavors just tasted like sugar to me. This tastes like concentrated grapes. You get a bit of the tannins and a rich and unexpected depth of flavor. The gathering of these grapes was well worth the effort. Like many wild foods, you have to hit it when the time is right. I gathered and made this jelly last week and the remaining grapes in my neighborhood are already drying out. Some may continue to be available at higher and cooler elevations over the summer and fall.

Wild Grape Jelly
Ripe wild grapes
Sugar
Lemon Juice

Step 1 - Make the Juice
Remove the grapes from the stems. Wash and sort them, removing grapes that are spoiled and any debris. Place the grapes in a large pot with enough water to cover the bottom by 1/2 inch. Bring to a boil, reduce heat. Simmer until the grapes are soft. You can help them release their juice by mashing and stirring with a potato masher as they cook. Once the grapes are pulpy and the seems easily separate from the rest of the fruit, remove them from the heat. Line a colander with several layers of cheese cloth and place the colander over a tall pot. Gently pour in the cooked grapes. Allow the fruit to drain, undisturbed, 8 hours or overnight. Do not squeeze the fruit in the cloth. Let the juice stand for several hours to allow the tannins to settle to the bottom of the pan. Carefully pour the juice off and leave as much of the sediment behind as possible. Now your juice is ready to make into jelly.

Step 2 - Make the Jelly
Prepare the boiling water bath and several jars, lids and rings. Place some saucers and teaspoons in the freezer. Measure the grape juice. Your batch can be somewhere between 4 and 6 cups. Don't use more than 6 cups of juice. Add 3/4 cup sugar for each cup of juice. Stir to dissolve. Taste and add lemon juice to balance the sweetness. (My grapes were quite sweet and I added a couple of tablespoons of lemon juice just to balance the flavor. The lemon juice is not needed for a safe acidity with most wild grapes.) Bring the juice and sugar to a boil. Reduce heat slightly and continue to boil until the juice reaches about 220 degrees. Jelly does not visibly thicken like jam does. You can use the thermometer to let you know when to start the saucer testing. Once the temperature is reached, use one of the frozen spoons to scoop out a small amount of the jelly. Place the spoon back in the freezer for a few minutes. Observe how the jelly pours off the spoon onto the saucer. When it sheets or bloops off, push what has fallen to the saucer with your finger. If it wrinkles and mounds up, it is ready.

Remove the jelly from the heat and skim any foam. Carefully ladle the jelly into the hot, prepared jars. Leave a quarter inch head space. Wipe the rims and cover with the prepared lids and rings. Process in the boiling water bath for 10 minutes. Use your jar lifter to remove the jars from the boiling water bath, being careful to keep the jars level, and place them on a towel lined tray. Do not disturb the jars until after the seal has formed. The jelly's set will become more firm over the next few days.

I gathered two 9 X 13 baking pans full of grapes before I started this process. The grapes I gathered made 6 half-pint jars.

Saturday, August 11, 2012

You Say You Want to Make Some Pectin


I periodically share a recipe with your that includes some of my homemade apple pectin. There is really nothing wrong with commercial pectin. It's made from fruit, but it's very processed. Commercial pectin reduces cooking time, which can be desirable. But a short cooking time isn't the best if you don't want your fruit to float, or if you want to infuse an extra flavor, such as from vanilla beans or cinnamon sticks. Silly me, I like the challenge too. I think I'm getting to know the fruit better when I work with its own pectin. If I discover that it just won't set up on its own, I can add some of this apple pectin for the second try.

I didn't even know you could make your own concentrated pectin until I saw this post from Tigress in a Jam. It's really easy. She cans hers, but I like to keep them in the freezer.

My father-in-law has a McIntosh tree. He  LOVES his Macs! The last couple of years, I've gathered the apples that fall to the ground when they are still green to make pectin. You can make pectin from any unripe apple, or you can use granny smith apples. They are loaded with pectin. You can also make pectin from quince, but they are so fragrant and their reduced juice so red, that they will not hide in your jam like this apple pectin will.

This is one of those recipes where you can use any amount you happen to have on hand. I package it in 2/3 cups portions in freezer bags. This seems like the right amount from most batches of jam. My experimental jams tend to work with 6 to 8 cups of prepared fruit. Sometimes I break them in half for medium-pectin fruits or mixtures that include a high-pectin fruit.

Apple Pectin
Apples - unripe or granny smith
Water to cover the bottom of your pan by 1 inch

Wash the apples. If they have any bruises or wormy spots, trim them away. Chop the apples into 1 inch pieces. Use the peel, cores and seeds. These have a lot of the pectin. Add the apples to a large pan and add enough water to cover the bottom of the pan by 1 inch. Bring to a boil, reduce the heat and simmer until the apples are very tender. Remove from heat and allow to cool slightly. Process the cooked apples through a food mill to remove and discard the skins, cores and seeds. Place a large colander, lined with 3 or 4 layers of cheese cloth, over a large pot. Pour the apple puree and allow it to drain for several hours or overnight. Remove and discard the pulp and cheese cloth.


Bring the remaining juice to a boil. Reduce to a low boil and simmer until it is reduced by half. It will turn slightly pink as it reduces. Allow to cool and measure 2/3 cup portions into marked freezer bags.


Add to low-pectin fruits when making jam. Unlike commercial pectin, this is added at the beginning. Use the frozen spoon and saucer method to test for doneness.

Now, when I share a recipe that includes this good stuff, you will know how to make it for yourself!

Friday, August 10, 2012

Random Food Fridays - Quesadillas


I've been using my Weber Kettle a bunch this summer. I think I'm really getting the hang of this indirect heat thing. One of our grilled meals this week was a pork tenderloin roast. I seasoned it very simply, with salt, pepper and garlic/herb seasoning. I put over direct heat for about 5 minutes on each side, then placed it over indirect heat to finish. I roasted sweet corn in their husks too. Both the corn and the pork took about 30 minutes. I did a bunch of veggies on skewers and added them at the 15 minute mark. I brushed the veggies with olive and seasoned them in the same way as the meat. Simple

When I go to the trouble to get that big old kettle going, I like to fill it up! When our food is done and there are still coals left, I'm often tempted to go door-to-door and say, "Hey, I've got hot coals. You wanna cook anything?" Filling up the Weber Kettle for two people usually means yummy leftovers for the rest of the week.

One of the scrumptious leftover treats I had was this quesadilla. It is simple and delicious. Sliced pork, sweet corn, avocado, cheese and a few shots of Tapatio hot sauce. Delish!

That little side salad is just sliced tomatoes, avocado, a dollop of Greek yogurt and a few grates of cheese.

Quesadillas are one of those foundational foods that you can make your own. Like soup, salads and sandwiches, the variations are limitless. The thing that made this one so yummy was the crunchy sweet corn combined with the hot sauce. Yum!


Saturday, August 4, 2012

Getting Started - Equipment, Safety and Delicious Jam


I've been meaning to do this for a long time. Most of the time, my kitchen adventures are fairly solitary. I love being creative in my hot little kitchen. It's a bit of a dance that can be harder with a partner, unless you've practiced. Also, taking good photos is a lot harder than making good jam. Especially while you are busy making jam. My dear friend, Katy, volunteered to come over and take photos of me at work. I'm a visual person and wanted to show you what I mean when I give instructions like, prepare the jars.

You can always go to the official source for canning safety - the USDA. Their instructions are factually accurate, and they do important work, but I can't help but feel that they scare the bejeezers out of people. Botulism is no joke! (More on that later.) But avoiding it is easy.

So, here we go! I will try to break it down into clear and easy steps. As you will see, I'm just a regular gal in a regular kitchen using mostly regular stuff. If I can do it, you can too!


1. Preparing the jars - You must use jars that are meant for home canning. Do not try to use old jam jars from the store. They are not designed for reuse. As long as your jars remain free of cracks and chips, they can be reused indefinitely. If you are reusing jars, run your finger along the rim to feel for chips or cracks. Small chips render the jars unfit for canning, but they can still be used for dry storage or to take your tea to work. I try to keep my current canning jars separate from retired canning jars.

I carefully wash the jars in very hot water, rinse and drain and then place on a baking sheet. If you have a dishwasher, using it is a great way to get your jars super clean. I place the jars in the oven at 250 degrees for 20 minutes. This takes care of sterilization. I then hold the jars at 220 degrees. You can sterilize your jars in the same boiling water that you will later use to process your jam, but I have found that process full of scalds and issues. Holding the jars hot and sterile in the oven allows me to prepare many jars at once and then use them as the batches are ready.


2. Prepare the lids - The ring part of the lids may be reused, but the flat part with the seal cannot. Be sure to retire any rusty or bent rings to the dry goods cupboard.


Rinse both parts in hot soapy water and rinse clean. I like to place the lids inside the rings rather than keeping them separate.


Place the clean lids and rings into a sauce pan with warm water to cover. Set the pan on the stove and set it on the lowest setting. Some recipes will tell you to boil the lids, but this damages the sealing compound. It only needs to be warmed enough to soften.


3. Prepare the boiling water bath - A large soup or stock pot works well for the boiling water bath. There is no need to purchase a special canner. What you need is a liner that will prevent the jars from touching the bottom of the pan. I like this silicone basket from the Ball Canning Discovery Kit. You can also find wire baskets that you can insert into your own pot from Norpro. They were at my local restaurant supply for less than $10 each and come in two sizes. Many other retailers offer canning racks that will work just as well as a traditional canner. When I'm working on very large batches, I break out my tamale steamer. Remember that your jars will displace water, so only fill to within about 2 inches from the top. I usually start a tea kettle about this same time. That way, if I need to add some water to cover the jars, it will be nice and hot.


Place the boiling water bath on the stove and bring to a boil. Once it has come to a boil, reduce heat to a  brisk simmer while you complete the jam.

4. Prepare the fruit - I chose blueberries for this example because they are the easiest jamming fruit in the world. If you are using other fruits, some may be prepared a day or two in advance and mixed with the sugar to macerate in the fridge until you are ready to process the jam. I often do complex jams over several week nights.


For blueberries, all you have to do is pick them over. 
Look for stems or any spoilage. Remove the stems and spoiled berries.


Place the rest in a colander and rinse them in cold water.


This recipe uses 2 pounds of blueberries. Costco sells 2 pound boxes of organic blueberries. This could make your measuring very easy. I like to use a kitchen scale. This digital scale is designed so that you can place your bowl on the scale and set the scale to zero. This is called the tare weight, which means you can measure the food weight without the weight of the bowl.


2 pounds, 0 ounces


Pour the berries into a bake pan and crush with a potato masher. Don't over do it. You want to release some of the juice and pulp, but still have some whole berries for texture. Do not use a food processor or immersion blender or you will lose all the character of your fruit.


Scrape the crushed berries into a very large, non-reactive, pot. I have a great 8 quart stainless steel pot that I picked up from a sale table at Macy's for $20! The qualities you want in your jamming pot are a heavy bottom to help prevent scorching, solid riveted handles that are either hollow or made of a material that will stay cool and a wide opening. A big part of cooking jam is the removal of water through steam. The wider your pot, the quicker this will happen.


Add 1/4 lemon juice. Lemon juice is important for a few reasons. Lemon juice will brighten and balance the flavor of sweet fruits like blueberries. Also, acid is essential for the safety of your finished product. Hi acid recipes may be processed in a boiling water bath. Low acid foods are better frozen. If you wish to can low acid items, you will have to learn to use a pressure canner. 


What does acidity have to do with safety? It has to do with botulism. Sugar is a preservative, but doesn't do the whole job. The sterilization of the jars, lids and rings and the processing of the jam in the boiling water bath will take care of any molds and most bacteria. Botulism exists in two forms. One is active and one is a spore that is inactive. The spores are not toxic. Active botulism excretes a neurotoxin that paralyses nerves. The boiling water bath kills any active botulism but it does not reach a high enough temperature to kill the spores. The spores can grow and do their toxic thing in anaerobic environments that are not acidic enough. All canned goods that are processed in a boiling water bath must be at least 4.0 when measured for acidity. I purchased some litmus strips at my local brewing supply store. The lower the number, the more acidic the product is. Luckily, most fruit is considered acidic. Tomatoes are borderline. Veggies and meats are low acid and must be processed in a pressure cooker to insure that the temperature rises high enough to kill the botulism spores. It is really not necessary for you to use litmus strips if you follow a reliable recipe. I do some experimentation, so I bought them to make sure all of my products would be safe. A good rule of thumb is that you must substitute only items of equal or greater acidity. The Ball Blue Book is a great source to help you find out the properties of specific fruits.


Measure the sugar. This recipe calls for 3 1/2 cups. I prefer measuring cups that are designed for dry goods when measuring sugar. If you want to can much, you will want some good tools for dry and wet measuring. Measuring cups measure by volume, so you may also want a scale to measure by weight. (BTW - my Grandma's ancient Tupperware for a whole ham holds 10 pounds of sugar very nicely.)


Mix everything together in the pot.


Stir for a bit to release the juices.


5. Cook the fruit - Place on the stove. Bring to a boil, stirring frequently. (I often do some clean up during this part.) Because blueberries are not very juicy, start with a medium-high heat and keep an eye on it. After it begins to boil, more juice is released and there is less danger of scorching until the end.  This jam does not use commercial pectin. If you use a commercial pectin, you have to follow their rules. They often ask for a hard boil. For these blueberries, I prefer a brisk boil. Once your fruit is boiling, do not leave the kitchen. Many fruits foam up a lot and you will need to make sure that nothing boils over.


When you start cooking the fruit, place a few saucers and tea spoons in the freezer. I use them to test for set.


As the cooking progresses, the foam will subside and the surface will become glossy. You can use a thermometer to measure the temperature. The official gel set temp is 220 degrees. I have found that using a thermometer to test for set is unreliable. For a jam to set, there must be pectin. The more pectin a fruit contains, the lower the temperature required for set will be.

What is pectin anyway? Pectin is a water soluble fiber that is found in the cell walls of plants. Commercial pectin is usually made from citrus fruits. I make my own homemade liquid pectin from green apples. (A post for another day.) High pectin fruits include apples, citrus rinds, quince, cranberries, blueberries, raspberries, blackberries and grapes. A lot of pectin is provided by skins and seeds. Low pectin fruits include apricots, cherries, peaches, pears and strawberries. Again, the Ball Blue Book is a great resource. I also like the Blue Chair Jam Cookbook.


After about 30 minutes, the jam will begin to thicken. See how the surface is glossy and there is no foam? Different fruits will differ a great deal in cooking time depending on how much pectin is available. This is when I start the testing.


To test the set, use one of the spoons from the freezer and scoop out some jam. Place the spoon back on the saucer in the freezer. Check it in about two minutes. It should be just cool. Tip the spoon. Does the jam run right off? Does it hold together and come off in a sheet? Use your finger to push the jam that is now on the saucer. The jam above is nearly ready, but not yet. My finger left a trench, but the jam didn't wrinkle or mound up.


Here is the test that showed me it was ready. I used my finger to push the jam that was on the spoon. See how it mounded up around my finger. Also, as I pushed it, wrinkles formed as the mound was built.


6. Filling the bottles - I usually set up a canning station that includes a clean towel spread on the table and has everything else in place. When the jam is ready, remove it from the heat and set it on some hot pads.


 Allow the jam to cool for a few minutes, stirring gently. This helps the fruit to be more evenly distributed throughout the jam. This is also the time to remove every bit of remaining foam. For this batch, I didn't have any. You remove the foam by skimming the top of the jam with a flat metal spoon. I like to save the foam for a snack!


Pull a hot jar out of the oven.


Place the funnel in the jar.


Carefully ladle the hot jam into the hot jar.


If your fruit is chunky, use a wooden chop stick or bamboo skewer to poke the jam. This will release any trapped air bubbles. Creating a good vacuum seal on the lids requires that the air be able to escape, so you don't want air trapped in the product.


Measure the head space. Head space is the space between the jam and the lid. For jams and jellies, use 1/4 inch head space. 


Use a clean, damp cloth to wipe the rim. Any jam on the rim may prevent a seal.


Use the tongs to remove a lid and ring from the lid pot. Place it on the jar.


Tighten the ring. Do not over tighten. There must be a means of escape for the air in the head space. I've read some recipes that call this finger tightening.


Complete all the jars. Use the jar lifter to pick up each jar and place in the boiling water bath. Be careful to keep the jars level so that the jam doesn't touch the lid. Again, this can impair the seal and also, the lids often have BPA, so I like to reduce contact. For this batch, all my jars fit into the boiling water bath. If are making a larger batch, you can hold the remaining filled jars in the oven until they get their turn.


I like wide mouth half-pint jars because I can stack them in my boiling water bath. I just have to make sure they are covered by an inch of water. This time, I had to add some extra hot water from my kettle.


Process in the boiling water bath for 10 minutes. This is pretty standard for jams and jellies. Follow the recipe for other types of products. Some must process for as long as 45 minutes. Do not have the water boiling rapidly. A gentle boil, with a bubble or two rising several times per minute is enough.


When the 10 minutes are over, turn off the heat. Use the jar lifter to remove the jars from the water and place on a towel lined pan. Again, keep the jars level. There will be water on each lid and you may be tempted to poor it off. It will either evaporate or you can wipe it away after the seal has popped.


Allow the jars to sit undisturbed until each one seals. The lids will making a popping sound as the vacuum pulls the lid down. The lids start with a convex bump that becomes concave when the seal is formed.


After the seal has formed, you can gently wipe the water off the lids. I also like to remove the rings so that they will dry overnight. If you leave the lids on, they may trap water and rust. Some people like to store their jars without the rings for this reason. I live in an arid environment and I have found that I can store them with the lids as long as they've dried thoroughly. You can store your jam in a cool, dry place for about two years. I always label with flavor and date so I can track the expiration and rotate so the oldest jams get used first. Also, take my word for it, at least make a note on each finished tray so that you know what it is. If you make blueberry and blackberry on the same day, you won't be able to tell which is which.


Here is a big scoop of this delicious jam on my morning yogurt. 
I hope this set of instructions will encourage you to try jamming in your own kitchen!

Special thanks to Katy!